Looking back at what we learned#
Writing simple programs by combining building blocks
Working with files and scripts using shell
Working with advanced libraries
Searching for answers to your coding problems online
Keeping track of a project using git
By the way: don’t worry if you do not feel comfortable with one of these topics: most of these cannot be learned in a day!
Structuring (python) code#
We have learned the basics of python by now, and have seen how to use various python concepts and powerful libraries from Jupyter notebooks. This is a perfectly viable way to work, as long as projects are not too complicated.
Real-life projects however usually turn out to be more complex, with code accumulating over time. In this case structuring your code is vital.
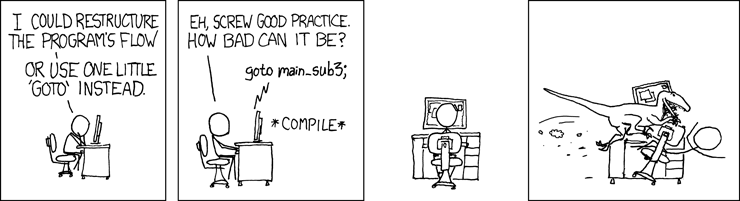
(Image © Randall Munroe, XKCD, https://xkcd.com/292/, CC-BY-NC v2.5)
Task: what distinguishes good software project from a bad one?#
Good code does not contain repetitions of same code blocks
Good code is readable by people who did not write it or you after a while
…
…
Write 3 and 4 yourself!
Bonus question: how to learn about structuring your code?#
Reading code written by others, in github for example.
Asking other people to read and help you structure your code.
Write 3 and 4 yourself again!
Case study: simulation of orbital motion#
%matplotlib inline

import numpy as np
from matplotlib import pyplot
# A planet's orbit
N = 1000  # Number of time steps
dt = 0.1
Gmm = 1  # Strength of the gravitational force
r = np.zeros((N, 2))  # Coordinate
v = np.zeros((N, 2))  # Velocity
r[0] = [1, 0]
v[0] = [0, 1]

for i in range(N-1):
    r[i+1] = r[i] + dt * v[i]

    force = -Gmm * r[i] / np.linalg.norm(r[i])**3
    v[i+1] = v[i] + dt * force

pyplot.subplot(aspect='equal')
pyplot.plot(*r.T)
Is this code well written? How do we tell?
Task 1#
Tweak the parameters of the cell above to confirm that reducing a time step improves the precision
Copy the cell and plot a hyperbolic trajectory by increasing the velocity to a larger value.
Solution#
Show code cell content
# Particle
N = 10000  # Number of time steps
dt = 0.01
Gmm = 1  # Strength of the gravitational force
r = np.zeros((N, 2))  # Coordinate
v = np.zeros((N, 2))  # Velocity
r[0] = [1, 0]
v[0] = [0, 1.42]

for i in range(N-1):
    r[i+1] = r[i] + dt * v[i]

    force = -Gmm * r[i] / np.linalg.norm(r[i])**3
    v[i+1] = v[i] + dt * force

pyplot.subplot(aspect='equal')
pyplot.plot(*r.T);
Task 2#
There must be a better way, which avoids all the copying!
We are doing the same task over and over: plotting the trajectory given the starting parameters. This calls for making a function.
Define a function that takes initial coordinate, velocity, dt, and the number of steps, and plots the trajectory
Solution#
Show code cell content
# Strength of the gravitational force
# We decide to not vary this, so we keep it a global variable
GRAVITATIONAL_CONSTANT = 1

def plot_trajectory(r0, v0, dt, N):
    Gmm = GRAVITATIONAL_CONSTANT

    r = np.zeros((N, 2))  # Coordinate
    v = np.zeros((N, 2))  # Velocity
    r[0] = r0
    v[0] = v0

    for i in range(N-1):
        r[i+1] = r[i] + dt * v[i]

        force = -Gmm * r[i] / np.linalg.norm(r[i])**3
        v[i+1] = v[i] + dt * force

    pyplot.subplot(aspect='equal')
    pyplot.plot(*r.T)


plot_trajectory([1, 0], [0, 1], 0.1, 1000)
#plot_trajectory([1, 0], [0, 1.45], 0.1, 1000)
Python functions and modules#
Collecting commonly used code#
Typically, in your project you will develop some core functionality that you will use over and over again - for example some function
def do_some_fancy_stuff(arguments):
    ...
You then use this function for many purposes. Over time, you will have several notebooks using it, and then you would need to copy the function and all related code to each notebook!
This is not practical, and error prone.
In this case you should put the function and all related code into a python module. This means you put the code in some text file with a name ending in .py, let’s say
module.py. Then you can use this function in any notebook you want by importing the module:
import module

module.do_some_fancy_stuff(...)
Alternatively, you can also write
from module import do_some_fancy_stuff

do_some_fancy_stuff(...)
but you already saw that syntax in Day 1 basic introduction in from math import ....
Separation in different namespaces#
Another advantage of modules is that it helps you to avoid errors that may arise if too much code gets intermixed. Say you have code like this:
c = 1

def f(x):
    return c * x
The function f(x) depends on a global variable c. Now say you write a lot of code in between, and you define the variable c for some other purpose overwriting it by accident (you forgot it was even used before). Then you will change the behavior of f(x)! Try that below
f(1)
c = 2
f(1)
If you separate the code into a module function.py which reads
c = 1

def f(x):
    return c * x
and you use it as
import function

function.f(1)

c = 2

function.f(1)
then no problem arises. f uses the variable c from the namespace of the module, whereas you used the variable c from the namespace of your notebook. You could stil change c in the module, but then you need to write module.c = 2 - which makes it immediately clear what you do.
Namespaces are a powerful concept in python. They also apply for example to functions - if you write
c = 1

def f(x):
    c = 2
    return c * x
c = 1
print(f(1))
c = 3
print(f(1))
then the variable c within the definition of f(x) is used. Note however that in this case you cannot access the variable c as f.c (try what happens if you do that).
This was a simple example of nested namespaces. If you want to know more, then google it!
Docstrings#
If your code becomes more and more complex, you need to add documentation. A convenient way in python is to add documentation directly to the function by wrting a string directly after the function definition:
def f(x, y):
    """Compute the height of a point on a plane

    Parameters
    ----------
    x : float
        X-coordinate
    y : float
        Y-coordinate

    Returns
    -------
    z : float
        Height
    """
    pass
You can then access the documentation from the Jupyter notebook simply by writing
fand hittingSHIFT + TABto show the first part of the docstringf?orhelp(f)to get the full docstring
You can also add a docstring to the top of a module file.
Task 3#
Add a docstring to our orbit simulator
Designing good functions#
Is our new simulation well designed?
Task 3#
Discuss the following questions with your neighbor:
How we be sure that we didn’t introduce an error? Maybe the new implementation is a little bit different?
Does our function take all the correct arguments? Can we improve its input?
What should the function return?
Based on this discussion, improve the function. (There are many different options)
Testing#
If the code is complex, changes of this code become hard to check as well. Imagine a function you wrote being used in 50 different places.
It is very easy and common for everybody, even the most experienced programmer, to introduce bugs in your code while working on it. Often those bugs may not affect what you are doing now, but break some stuff you did before! On many occasions you can catch these problems by writing tests alongside your code.
(In principle, there are several frameworks for keeping track of tests in python - we are using pytest, which is the a common and user-friendly option)
What you have to do is simple: When you wrote some code in a module, add another python file that starts with test_, and add a function to it that starts with test_ (that’s easy to remember, right;). For example, in the module module.py you might have:
def add_together(x, y):
    return x + y
In test_module.py you would write:
import module

def test_add_together():
    assert add_together(1, 2) == 3
    assert add_together("abc", "def") == "abcdef"
We introduced a new statement, assert. Let’s check here in the notebook, what it does:
%%writefile module.py
assert 1 == 1
Nothing happens in this case. But now let’s see what happens if we assert a statement that is not true:
assert 1 < 1
In this case, an AssertionError is raised.
The key is to introduce test functions that raise an AssertionError if something goes wrong.
So now you have a python file with lots of tests. You can run them all automatically by calling from the command line
py.test
within the folder containing the modules and tests. It will run all the tests you ever wrote, and show you all failures!
To make these tests useful, you would want to run them as often as possible. When you design them, try to use them on as small problems as possible, so that they run fast. In this way, you will often run them, and catch many errors.
Task 5#
Discuss how to test your function.
Implement a test and run it.
Object-oriented programming and classes#
Don’t use this unless you are completely sure you cannot avoid using it.
(That’s why we also don’t include an exercise for it).
Everything in Python is an object of some class:
type(1)
def f(x):
    return x

type(f)
type(print)
type(print)
type(None)
import numpy as np

type(np.array([1]))
Classes are a way of defining your own types of objects with custom properties and behavior.
Minimal example:
class Fruit:  # The way to define a class
    pass  # Empty statement to avoid a syntax error (try removing this)

green_apple_from_Jumbo = Fruit()  # Looks like we are calling a function
type(green_apple_from_Jumbo)
Objects have attributes, these are variables associated with the object.
green_apple_from_Jumbo.tasty = "maybe yes"  # assign an attribute

print(green_apple_from_Jumbo.tasty)  # access the attribute
Objects may also have methods. These are functions that can modify the state of the object.
class Fruit:
    def __init__(self, taste):  # The function used when the object is created.
        self.taste = taste

    def eat(self):
        if self.taste == "tasty":
            print('Wow, tasty!')
        else:
            print('Not tasty :-(')
green_apple_from_Jumbo = Fruit() # What will happen now?
red_apple_from_Jumbo = Fruit(taste='tasty')
red_apple_from_Jumbo.eat()  # Note that "self" is not passed as an argument!
One final piece to know about objects is inheritance: making a new class from an old one.
class Apple(Fruit):
    def __init__(self, taste, color):
        self.taste = taste
        self.color = color

green_apple = Apple('tasty', 'green')
green_apple.eat()  # Because green_apple is also a Fruit!
type(green_apple)
print("green_apple is an Apple:", isinstance(green_apple, Apple))
print("green_apple is an Fruit:", isinstance(green_apple, Fruit))